Make setup guide
FlowTrigger connects to Make (formerly Integromat) through its Custom Webhook module. You create a webhook in Make, paste the URL into FlowTrigger, and your phone becomes a trigger for any Make scenario. No accounts, no middleware — just a direct HTTP connection from your phone to Make’s servers.
How do I get a webhook URL from Make?
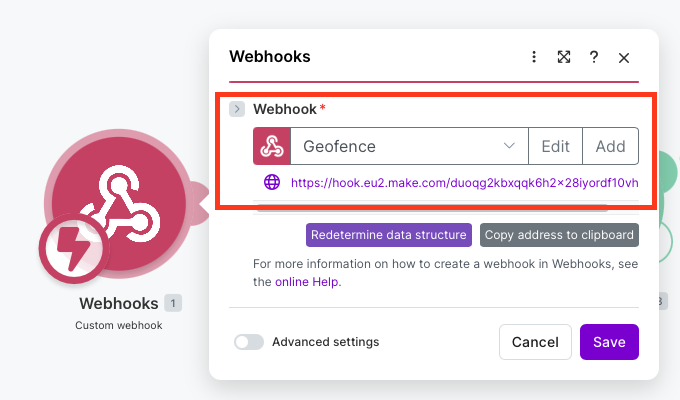
Make uses a dedicated Webhooks module to receive incoming HTTP requests. Here is how to create one:
- Log into Make and click Create a new scenario.
- Click the + button to add the first module.
- Search for Webhooks and select it.
- Choose Custom webhook as the trigger type.
- Click Add to create a new webhook.
- Give the webhook a descriptive name (e.g., “FlowTrigger Manual” or “FlowTrigger Notifications”).
- Click Save. Make generates a unique webhook URL.
- Click Copy address to clipboard to copy the URL.
- Paste this URL into FlowTrigger’s trigger configuration.
Important: After creating the webhook, Make waits for the first incoming request to learn the data structure. Leave the scenario editor open and send a test request from FlowTrigger before adding subsequent modules.
How does Make learn the FlowTrigger data structure?
After you send the first request from FlowTrigger, Make parses the incoming data and learns the field names and types. All fields then become available as selectable variables in subsequent modules. This is a one-time step — you do not need to repeat it unless you change the FlowTrigger trigger configuration.
If the webhook module does not update automatically after receiving a request:
- Click on the Webhooks module in your scenario.
- Click Redetermine data structure.
- Send another test request from FlowTrigger.
The fields available depend on which trigger type you are using:
- Manual trigger fields — text, photo, and audio inputs
- Chat trigger fields — message input and session ID
- Notification trigger fields — app name, title, body, category, and timestamp
- Location trigger fields — GPS coordinates, transition type, zone details, and device name
Routing with the Router module: If you use the same webhook for multiple trigger types, add a Router module after the webhook to split processing based on which fields are present — for example, route requests with notificationTitle to a notification processing branch and requests with latitude to a location processing branch.
How do I handle file uploads from FlowTrigger in Make?
When FlowTrigger sends photos or audio via a manual trigger, the request uses multipart/form-data. Make’s Custom Webhook module detects file uploads automatically — text fields appear as regular variables, and file fields appear as file objects with file name, MIME type, and binary content.
Uploading files to cloud storage:
Map the file data from the webhook’s output to a storage module — Google Drive, Dropbox, OneDrive, or any file storage module. For AI processing, send photoInput to OpenAI — Analyze Image or audioInput to a transcription service.
How do I build a chat workflow with Make?
FlowTrigger’s chat trigger sends input and sessionId to your webhook. To return a response from Make:
- Custom Webhook module — Receives the chat message.
- AI module — OpenAI, Anthropic (Claude), Google Gemini, Hugging Face, or any AI service via HTTP Request.
- Webhook Response module — Returns the AI output to FlowTrigger.
Set the Webhook Response body to:
{
  "output": "{{AI_module_response}}"
}
Conversation memory: Make does not have a built-in conversation memory module. To maintain context across messages, use a Data Store module to save and retrieve conversation history keyed by sessionId, or store history in Google Sheets or Airtable.