Location Trigger
Define geofence zones and get notified when you cross their boundaries, or track your route by sending GPS coordinates at regular distance intervals.
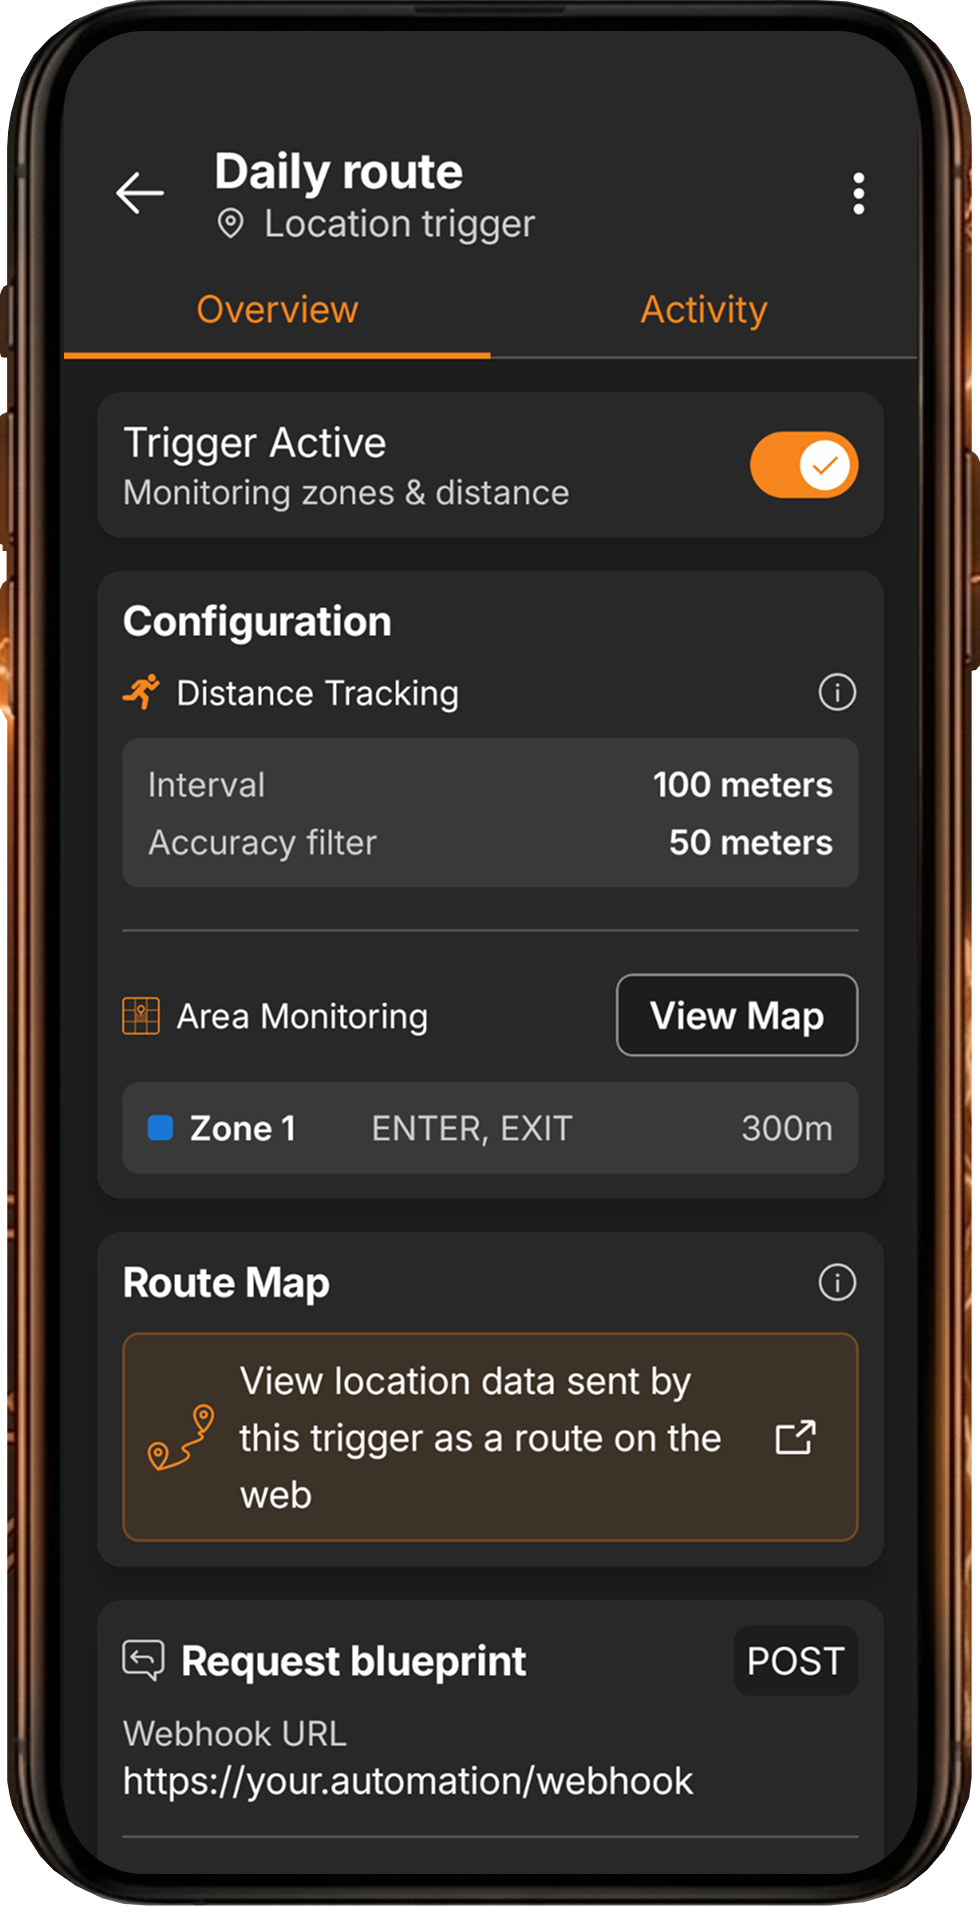
- Distance tracking — send your GPS coordinates every X meters traveled (minimum 50 meters). Ideal for route logging, fitness tracking, and fleet monitoring.
- Area monitoring — define up to 10 geofence zones with ENTER, EXIT, or both events. Get notified when you arrive at or leave specific locations.
- Both modes run simultaneously on a single trigger for complete location-based automation.
- Runs in background — no need to keep FlowTrigger open. The trigger continues monitoring and firing webhooks automatically.
- Offline support — when you lose internet connection, FlowTrigger caches all location requests locally and resends them automatically when connectivity returns. No data is lost.
- Premium feature with a 7-day free trial.
What is the difference between distance-based and area-based triggers?
Distance-based triggers send your coordinates at regular intervals as you move. Area-based triggers fire only when you enter or leave a defined zone. Here’s how they differ:
Distance tracking sends your GPS coordinates every X meters traveled. You set a distance interval (minimum 50 meters), and each time you move that distance from the last reported position, FlowTrigger sends a request with your current coordinates and a timestamp. Use cases:
- Route logging and travel tracking
- Fitness and outdoor activity recording
- Fleet or delivery tracking
- Building a location history in a spreadsheet or database
Area monitoring lets you define up to 10 geographic zones, each with a name, center coordinates, radius, and trigger events (ENTER, EXIT, or both). When you cross a zone boundary, FlowTrigger fires the webhook with the zone name and transition type. Use cases:
- Arrival and departure notifications (“I’m home”, “Left the office”)
- Automatic time tracking (log when you arrive at and leave a location)
- Smart home automation (turn on lights when you arrive)
- Safety alerts (notify when someone enters or leaves a defined area)
You can enable both modes on the same trigger. For example, track your route every 200 meters AND get notified when you arrive at or leave specific locations — all sent to the same n8n, Make, or Zapier workflow.
What does the JSON payload look like for a location trigger?
Location triggers send requests with Content-Type: application/json. Every request includes 11 fields covering your location, the event type, zone details, and device metadata.
Area monitoring event (ENTER/EXIT):
{
  "latitude": "52.5200",
  "longitude": "13.4050",
  "transition": "ENTER",
  "dateTime": "2026-03-18T09:15:32.000+01:00",
  "accuracyMeters": "12.5",
  "zoneName": "Office",
  "zoneLat": "52.5200",
  "zoneLng": "13.4050",
  "zoneRadiusMeters": "150",
  "deviceName": "Pixel 8",
  "executionId": "a1b2c3d4-e5f6-7890-abcd-ef1234567890"
}
Distance tracking event:
{
  "latitude": "52.5234",
  "longitude": "13.4115",
  "transition": "DISTANCE",
  "dateTime": "2026-03-18T09:22:10.000+01:00",
  "accuracyMeters": "8.2",
  "zoneName": "",
  "zoneLat": "",
  "zoneLng": "",
  "zoneRadiusMeters": "",
  "deviceName": "Pixel 8",
  "executionId": "f9e8d7c6-b5a4-3210-fedc-ba9876543210"
}| Field | Description |
|---|---|
latitude | Your GPS latitude at the time of the event |
longitude | Your GPS longitude at the time of the event |
transition | Event type: "ENTER", "EXIT", or "DISTANCE" |
dateTime | ISO 8601 timestamp of the location reading |
accuracyMeters | GPS accuracy in meters — lower values mean more precise positioning |
zoneName | Name of the geofence zone (populated for ENTER/EXIT, empty for DISTANCE) |
zoneLat | Center latitude of the triggered zone |
zoneLng | Center longitude of the triggered zone |
zoneRadiusMeters | Radius of the triggered zone in meters |
deviceName | Your device’s name — useful for multi-device setups |
executionId | Unique identifier for this location event — useful for deduplication |
All field names are customizable in the Advanced settings tab. The Advanced tab also provides the same HTTP configuration options as other trigger types: authentication, custom headers, and User JSON Fields.
How do I visualize my location data on a map?
FlowTrigger provides a free, interactive map visualization tool at flowtrigger.app/map designed for location data collected by location triggers:
- Set up your n8n, Make, or Zapier workflow to log location trigger data to Google Sheets (or any CSV source). Each row should contain at least
dateTime,latitude, andlongitudecolumns. - In Google Sheets, publish the sheet as a CSV: File > Share > Publish to web > select CSV format > copy the URL.
- Open flowtrigger.app/map and paste the published CSV URL.
The map tool draws route polylines between your location points, shows geofence zone circles for ENTER/EXIT events, displays directional arrows along routes, and provides filtering by date, device, and event type. It supports multiple devices with color-coded routes and includes a timeline sidebar showing your location history.
For the full CSV schema and all map features, see the Map page. For a complete end-to-end walkthrough — from setting up the trigger to viewing routes on the map — see the Location Tracking use case guide.
Other trigger types in FlowTrigger
FlowTrigger offers four trigger types to connect your Android phone with your automation workflows:
- Manual Triggers — press a button to send text, photos, audio, and voice-to-text to your webhook. Free to use.
- Chat Triggers — a conversational interface that communicates with an LLM running inside your workflow. Free to use.
- Notification Triggers — automatically forward notifications from selected apps to your webhook endpoint. Premium feature.