Expense Tracking — From Phone Notifications to Google Sheets
Send your Android phone's expense-related notifications to your automation workflow, log them to Google Sheets, and visualize your expenses.
How does expense tracking work?
Three pieces, working together: your phone collects expense-related notifications, an automation workflow parses each event, Google Sheets stores the log and visualizes it on a dashboard.
Automatic Expense Logging
Every time your wallet or banking app posts a transaction notification, FlowTrigger forwards it to your workflow. The automation reads the amount and merchant, then logs a clean row to Google Sheets — no manual entry, no receipts to scan.
Phone Notification
FlowTrigger captures expense notifications from your wallet or banking apps and fires a webhook.
Automation
n8n, Make, or Zapier parses each notification — extracts amount, merchant, and category.
Google Sheets
Each expense is appended as a new row, ready to chart on your dashboard.
Step 1 — Copy the Google Sheets template
Copy the ready-made Google Sheets template. It contains two tabs:
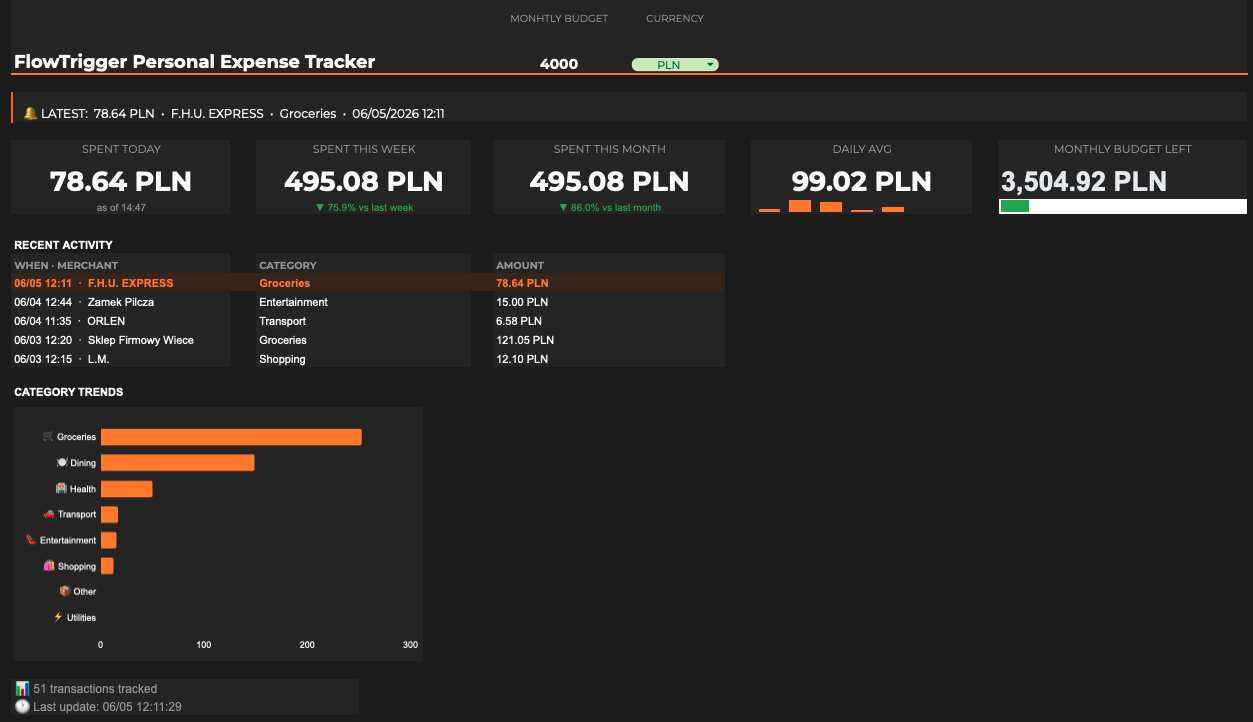
- Dashboard — visualizes your expenses in charts and pivot tables. It reads the data from the Transactions tab.
- Transactions — logs each expense event received from FlowTrigger and handles currency conversion.
Google Sheets template
Public template with the exact column headers FlowTrigger writes and the dashboard uses to visualize. Click below — Google will prompt you to copy it into your own Drive.
Make a copy of the templateStep 2 — Set up your automation workflow
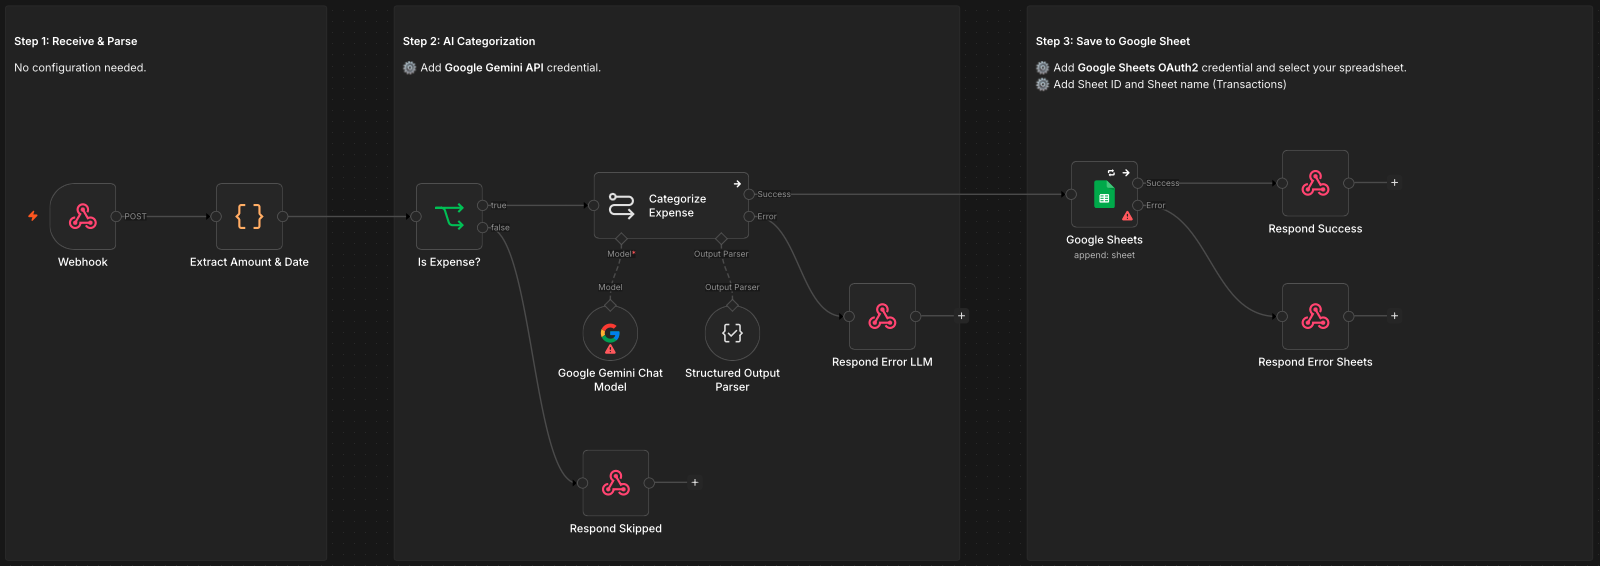
The workflow receives each notification from the mobile app, uses AI to categorize the expense type and extract the amount, and appends a new row to Google Sheets.
Download one of the ready-made templates below and import it into your platform. n8n and Make are covered out of the box; any tool that accepts an HTTP POST and writes to Google Sheets will work the same way — Zapier, Pipedream, custom code.
Make
Scenario blueprint
Open official Make website and click Use this scenario
Open Make blueprintEach template contains the setup that you can follow but you will need two main things to make it work:
- 1 AI API key — workflows use Google Gemini by default. Get a free key at Google AI Studio . Any other provider (OpenRouter, OpenAI…) works too.
- 2
Google Sheets connection — in the Google Sheets node, select the sheet you copied in Step 1 and authenticate your Google account.
- n8n — walkthrough video from the official n8n YouTube channel. Watch video
- Make — Google Sheets app documentation. Read docs
Once the workflow is running, each notification event from FlowTrigger appends one row to your Sheet. The dashboard tab reads the data and visualizes it in charts and pivot tables, giving you insights into your spending habits.
Step 3 — Configure the expense trigger on Android
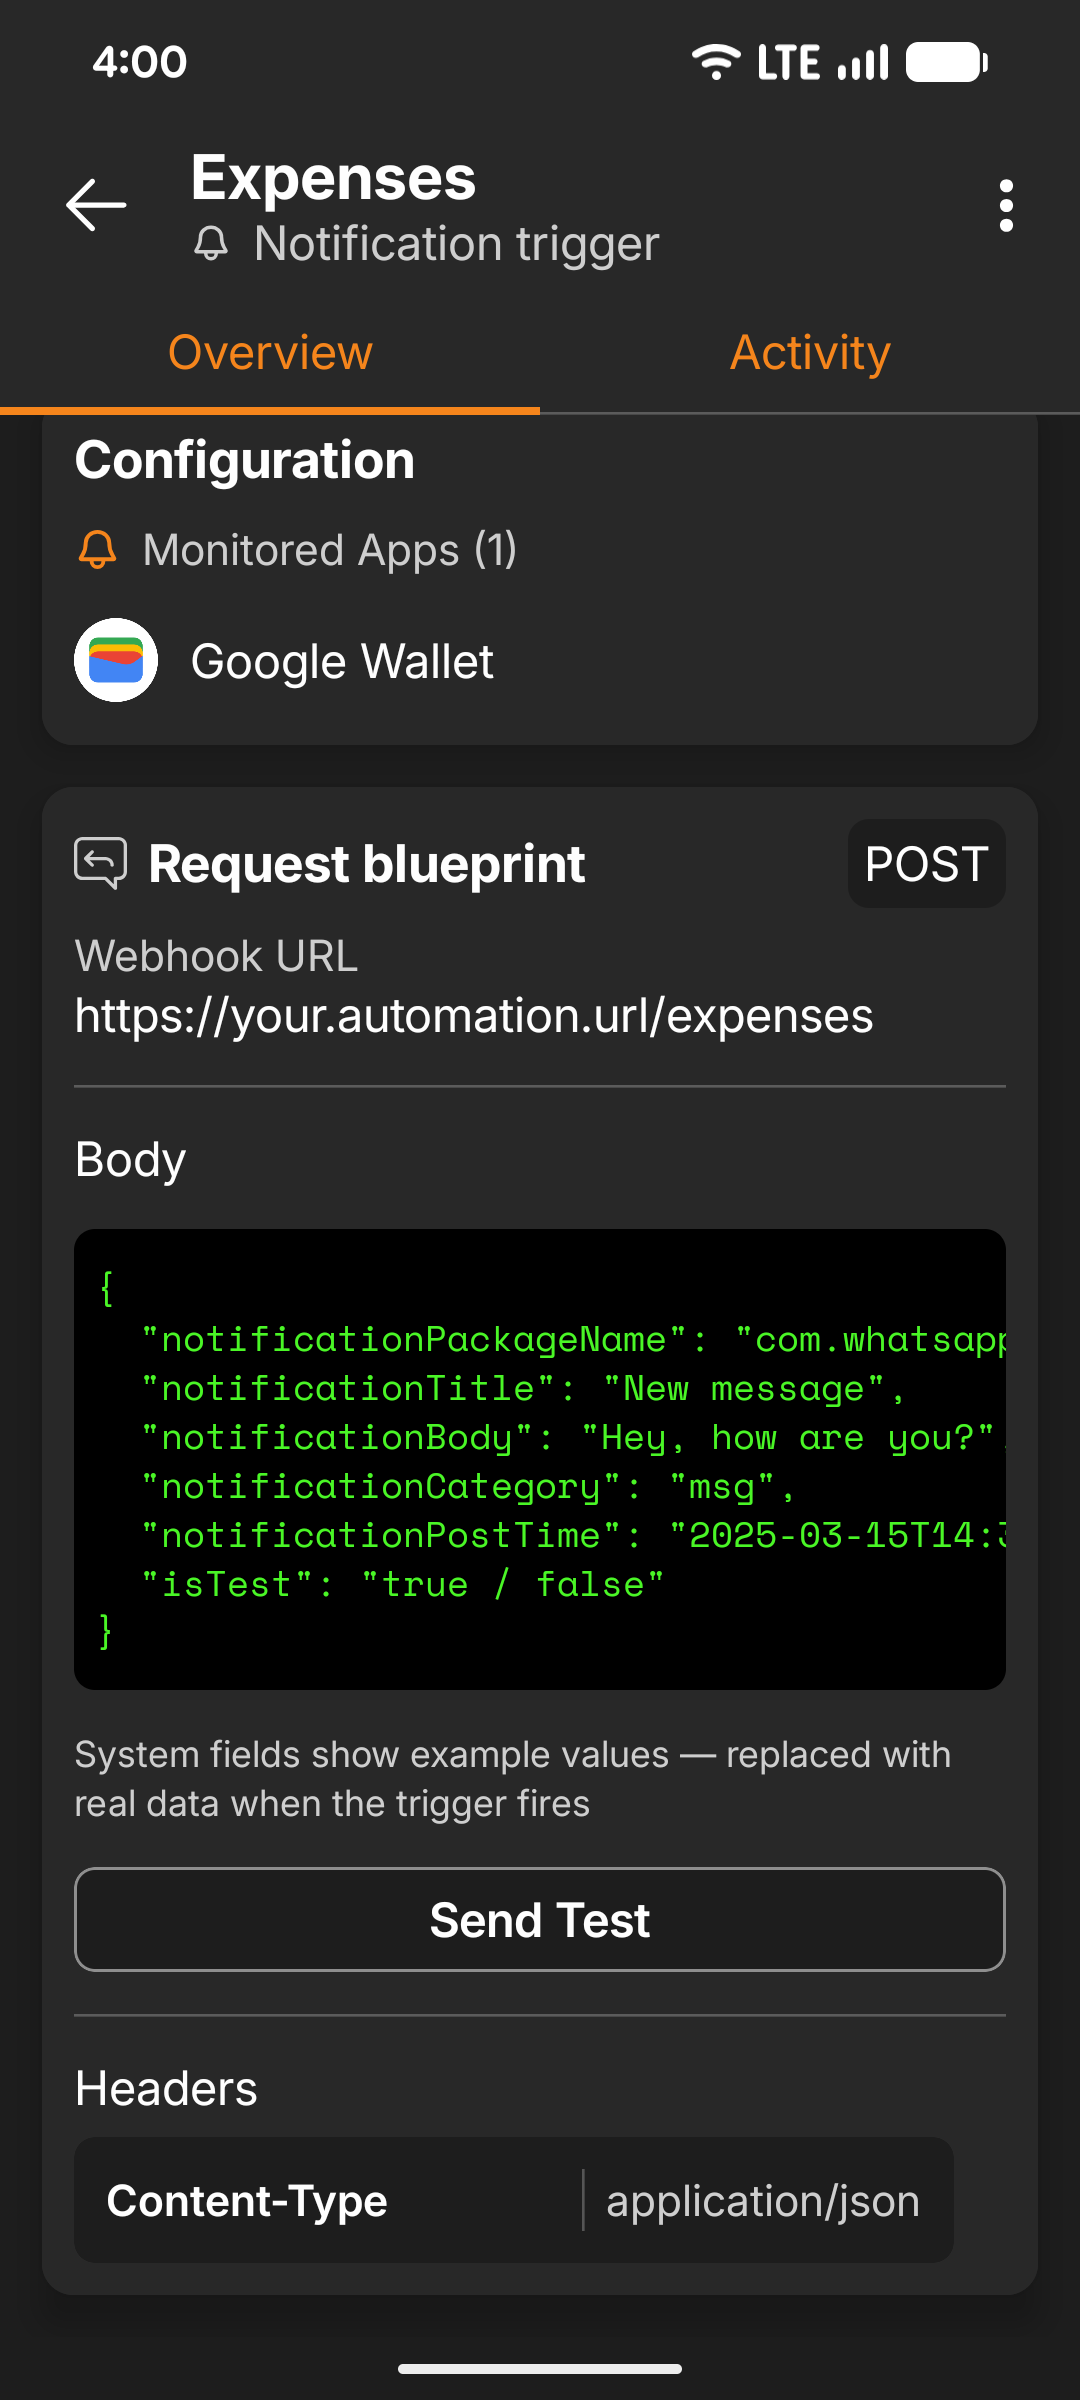
Final step is to create a Notification trigger in the FlowTrigger app and set the conditions for capturing expense-related notifications. Paste the webhook URL from your automation platform into the trigger's configuration, give your trigger a name and select your payments app.
Send a test event from the trigger detail screen — your automation receives one webhook with the real payload shape, which makes mapping fields to Google Sheets columns much easier.
For the full webhook payload, field reference, and customization options, see the Notification Trigger documentation.
Start tracking expenses today
Download FlowTrigger, set up an expense trigger, import a workflow, and watch your expense data land in your reports in minutes.